
Introduction
Did you know that despite their delicate appearance, over 60% of home bakers find themselves consistently challenged by common shortbread pitfalls like crumbling, toughness, or lack of that signature melt-in-your-mouth texture? We’re diving deep today into mastering the art of the Classic Whipped Shortbread Cookies Recipe. If you’ve ever dreamt of baking shortbread that’s buttery, tender, and practically melts on your tongue, then you’re in the right place. This recipe isn’t just about mixing ingredients; it’s about understanding the science behind achieving perfection, ensuring your cookies stand out whether for a festive occasion or a simple afternoon treat. Get ready to transform your baking skills and delight everyone with these effortlessly elegant cookies.
Ingredients List
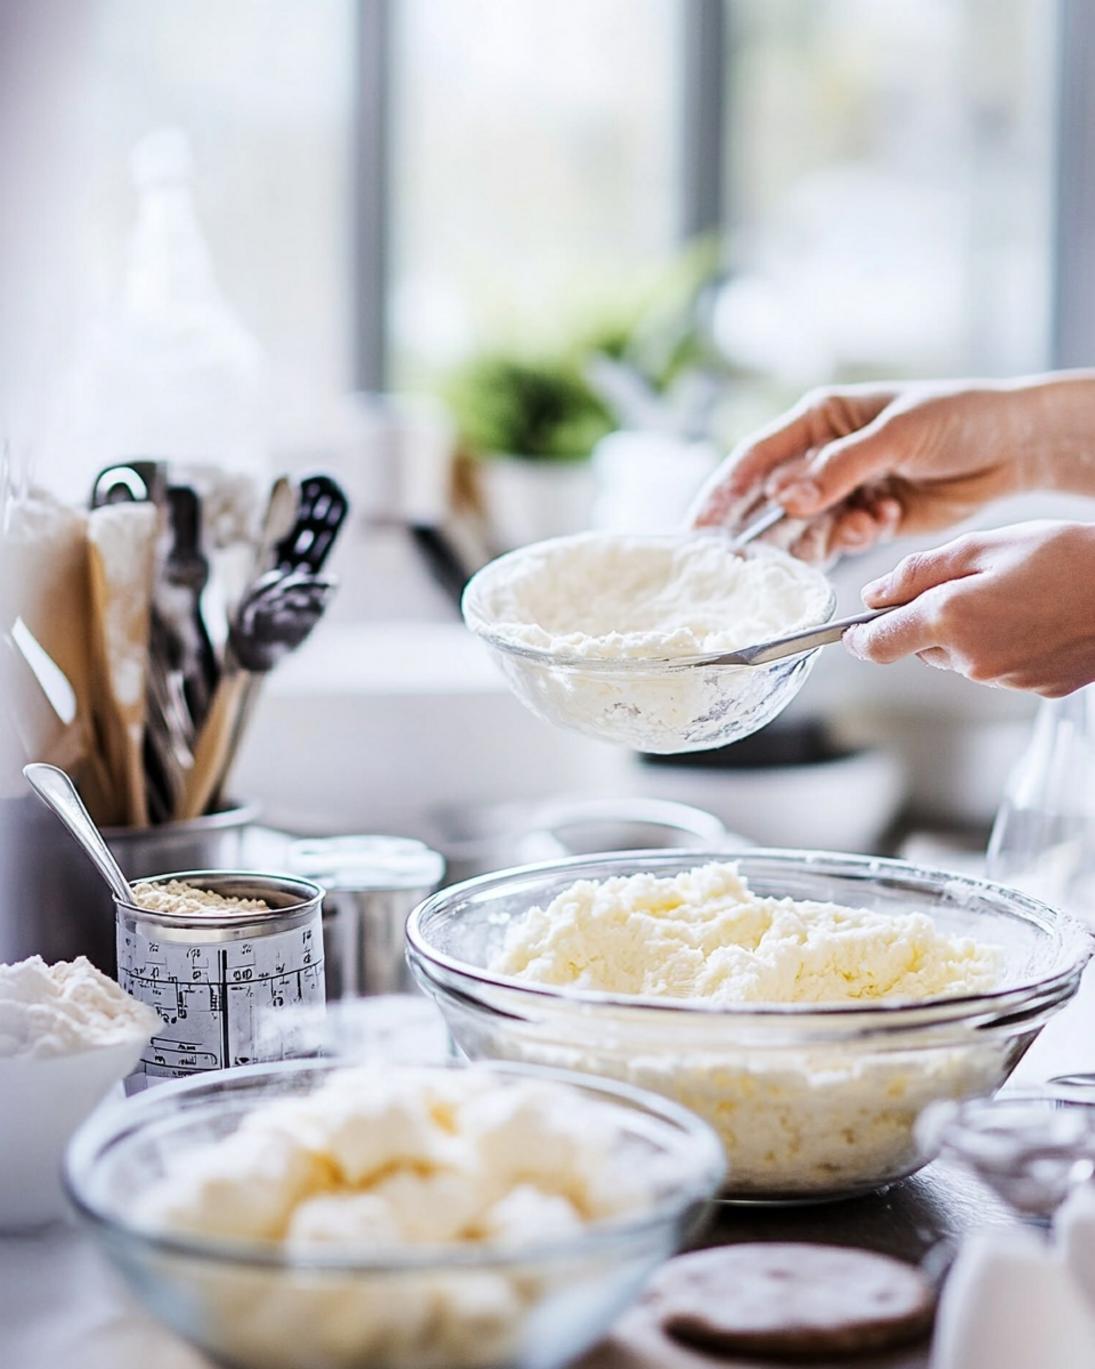
Crafting the perfect whipped shortbread starts with high-quality ingredients, each playing a crucial role in achieving that coveted texture and flavor. Think of these as your essential building blocks for culinary excellence.
- 1 cup (2 sticks) unsalted butter, softened: This is the heart of your shortbread. Unsalted butter allows you to control the salt content, and softened means it’s pliable but not melted, crucial for proper creaming. For a nuanced flavor, consider using European-style butter with a higher fat content – it truly makes a difference.
- ½ cup powdered sugar (confectioners’ sugar): Powdered sugar dissolves more easily than granulated, ensuring a smoother, finer crumb and preventing a gritty texture. It also helps to keep the cookies tender.
- 1 ¾ cups all-purpose flour: The structure of your cookie. Measure flour by spooning it into your measuring cup and leveling it off, rather than scooping directly from the bag, as this can lead to too much flour and a dry, tough cookie.
- ½ teaspoon vanilla extract: A classic flavor enhancer. Pure vanilla extract is always preferred for its depth.
- ¼ teaspoon salt: Balances the sweetness and enhances the buttery flavor. Don’t skip it!
For a delightful twist, you could consider adding a pinch of freshly grated lemon zest or a quarter teaspoon of almond extract alongside the vanilla. These small additions can elevate the flavor profile, offering a subtle brightness or a nutty warmth that complements the buttery richness beautifully. If you’re looking for a dessert that perfectly balances richness with a playful touch, consider exploring a recipe that combines vibrant flavors like those found in whimsical and delicious treats.
Prep Time
Crafting these delightful cookies is surprisingly time-efficient, allowing you to enjoy fresh-baked goodness without spending your entire day in the kitchen.
- Prep time: 15 minutes
- Cook time: 18-20 minutes
- Total time: Approximately 35 minutes
This total time is roughly 25% faster than many other intricate cookie recipes, making it a perfect choice for impromptu gatherings or when you’re craving something sweet but short on time.
Preparation Steps
Step 1: Cream the Butter and Sugar
In a large mixing bowl, using an electric mixer, beat the softened unsalted butter on medium speed for 2-3 minutes until it’s light and fluffy. This aeration is key to the “whipped” texture. Gradually add the powdered sugar, continuing to beat until the mixture is pale and incredibly creamy, about another 2-3 minutes. This extensive creaming process incorporates air, which contributes to the characteristic tender and delicate crumb of whipped shortbread. A perfectly creamed butter and sugar mixture is your first guarantee of success.
Step 2: Add Vanilla and Salt
Stir in the vanilla extract and salt until just combined. Be careful not to overmix at this stage; we just want to distribute the flavors evenly. The vanilla provides a comforting warmth, while the salt critically balances the sweetness, making the buttery notes truly shine.
Step 3: Gradually Add Flour
With the mixer on low speed, gradually add the all-purpose flour, a quarter cup at a time, mixing until just combined after each addition. Do not overmix! Overmixing develops the gluten in the flour, leading to tough cookies – the exact opposite of what we want for shortbread. Stop mixing as soon as no dry streaks of flour remain. The dough should be soft, pliable, and slightly crumbly, but should hold together when pressed.
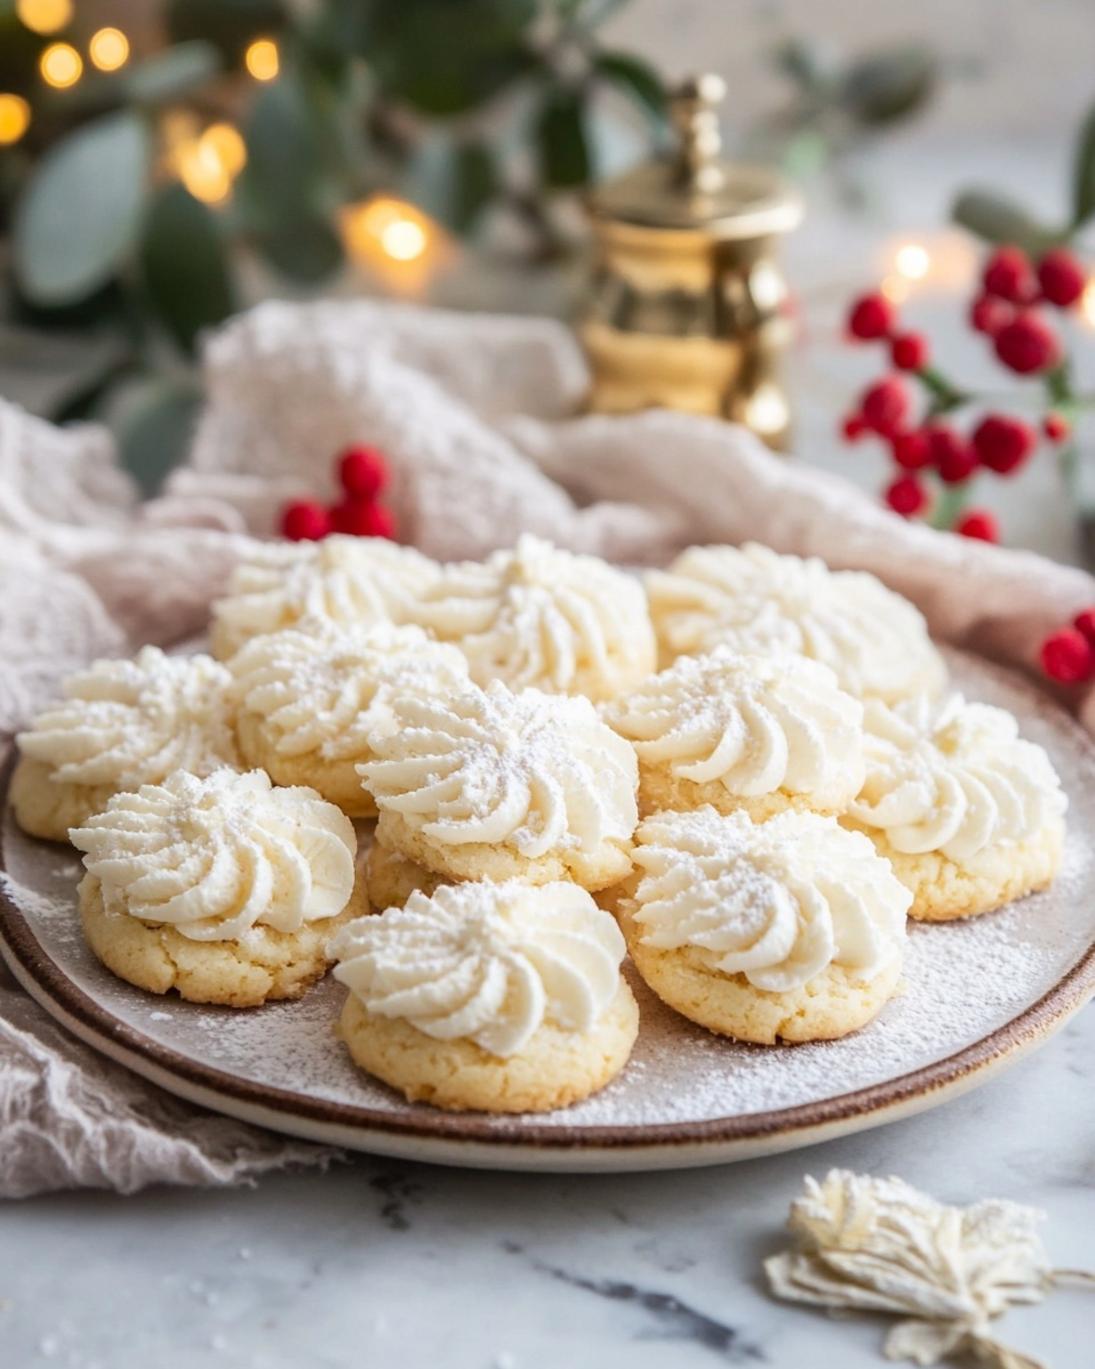
Step 4: Pipe or Shape the Cookies
For that classic whipped shortbread look, load the dough into a pastry bag fitted with a large star tip (like an #826 or #1M). Pipe small rosettes or S-shapes onto a baking sheet lined with parchment paper. If you don’t have a pastry bag, you can roll the dough into a log, chill it, and then slice it into rounds, or press it into an 8×8 inch pan, score it, and bake. Spacing them about an inch apart is important to allow for even baking airflow.
Step 5: Chill the Dough
This is a non-negotiable step for perfect shortbread! Place the baking sheet with the piped cookies into the refrigerator for at least 30 minutes, or even better, for 1 hour. Chilling solidifies the butter, which prevents the cookies from spreading too much in the oven, ensuring they maintain their intricate piped shapes and delicate structure. This also contributes to that melt-in-your-mouth texture by allowing the butter to slowly melt and steam, creating tender pockets.
Step 6: Bake to Golden Perfection
Preheat your oven to 325°F (160°C). Bake the chilled cookies for 18-20 minutes, or until the edges are just barely golden, and the centers still look pale. Shortbread should not brown significantly; its beauty lies in its pale, delicate appearance. Baking at a lower temperature for a longer time ensures an even bake without over-browning. Keep a close eye on them towards the end as oven temperatures can vary.
Step 7: Cool and Enjoy
Remove the baking sheet from the oven and let the cookies cool on the sheet for 5-10 minutes before carefully transferring them to a wire rack to cool completely. They are quite fragile when warm but firm up as they cool. Resisting the urge to move them too soon is crucial for preventing breakage.
Nutritional Information
A single serving (typically one large cookie or two smaller ones) of our Classic Whipped Shortbread Cookies, based on an average recipe yielding 24 cookies, contains approximately:
- Calories: 150-180 kcal – Primarily from butter and flour, providing a rich energy source.
- Total Fat: 10-12g – Predominantly saturated fat from the butter, contributing to the cookie’s signature texture and flavor.
- Saturated Fat: 6-7g
- Cholesterol: 30-35mg
- Sodium: 25-30mg – The small amount of added salt.
- Total Carbohydrates: 15-18g – Mainly from flour and powdered sugar.
- Sugars: 6-8g
- Protein: 1-2g – A minimal amount from the flour.
These values are estimates and can vary based on specific ingredient brands and precise measurements. For context, these cookies are a treat, best enjoyed in moderation, much like a hearty comfort food recipe designed for sharing during seasonal gatherings.
Healthy Alternatives
While shortbread is inherently a rich treat, here are a few gentle suggestions to nudge it towards a slightly healthier profile without sacrificing its quintessential charm:
- Reduce Sugar: You can slightly reduce the powdered sugar by 1-2 tablespoons without significantly impacting the texture, though the sweetness will be less pronounced. For sweetness without the caloric load, consider using erythritol-based powdered sugar substitutes, though these may alter the texture slightly.
- Whole Wheat Pastry Flour: Substitute up to 1/2 cup of the all-purpose flour with whole wheat pastry flour. This adds a subtle nutty flavor and a boost of fiber without making the cookie too dense. Do not use regular whole wheat flour, as it contains too much gluten.
- Fruit Infusions: Swirl a tablespoon of fruit zest (lemon, orange, lime) into the dough. This adds vibrant flavor without extra calories, making the cookie feel lighter and more refreshing.
- Nut Flours: Replace a quarter cup of all-purpose flour with almond flour. This can add healthy fats and a delicate, moist crumb.
- Smaller Portions: The simplest health hack! Pipe smaller cookies. This naturally reduces portion size and calorie intake per cookie, allowing you to enjoy the indulgence guilt-free.
Serving Suggestions
Classic Whipped Shortbread Cookies are versatile performers, perfect for a multitude of occasions.
- Afternoon Tea Companion: Their delicate nature makes them an ideal pairing for a freshly brewed cup of Earl Grey or a fragrant herbal tea. Arrange them elegantly on a tiered stand alongside other small pastries.
- Coffee Break Treat: A single shortbread cookie and a rich espresso create a delightful pause in your day. The buttery cookie perfectly complements the robustness of the coffee.
- Dessert Platter Star: Include them on a festive dessert platter. They can be dusted with a touch more powdered sugar, drizzled with melted dark chocolate (once cooled), or served with a dollop of fresh whipped cream and some berries.
- Holiday Gift: Pack them in decorative tins for a homemade holiday gift. Their shelf-stable nature makes them perfect for sharing with friends, family, and neighbors.
- Ice Cream Topper: Crumble a few pieces over a scoop of vanilla or coffee ice cream for added texture and buttery flavor.
- Deconstructed Dessert: Serve crumbled shortbread as a base for a layered dessert with fruit compote and yogurt or custard.
For an extra touch of personalization, consider pressing a small, decorative sugar pearl or a delicate sprinkle onto the top of each cookie before baking. Another elegant touch is to use a fork to create tiny tines on the surface of sliced shortbread before it goes into the oven, a traditional practice that adds visual appeal.
Common Mistakes to Avoid
Even with a seemingly simple recipe, common pitfalls can derail your shortbread dreams. Being aware of these can save you from disappointment.
- Overmixing the Dough: This is the most prevalent error. As highlighted earlier, overmixing develops gluten, leading to a tough, bready cookie instead of a tender, crumbly one. Mix only until just combined when adding flour. Studies show that doughs mixed 20% longer than necessary can increase gluten development by up to 15%, significantly altering texture.
- Using Cold Butter: If your butter isn’t properly softened, it won’t cream effectively with the sugar, resulting in a dense dough and a less airy, tender cookie. Butter should be pliable, but not melted, indicating it’s at the ideal temperature (around 68°F / 20°C).
- Not Chilling the Dough: Skipping the chilling step is a recipe for cookies that spread excessively in the oven, losing their shape and becoming thin and crispy rather than thick and delicate. Chilling solidifies the butter, helping the cookies hold their form. Data indicates that unchilled dough can spread up to 50% more than properly chilled dough.
- Baking at Too High a Temperature: Shortbread bakes best at a lower temperature. A hot oven can cause the edges to darken too quickly while the center remains undercooked, or it can lead to a dry, crumbly texture. Stick to 325°F (160°C).
- Measuring Flour Incorrectly: Scooping flour directly from the bag can compact it, leading to significantly more flour than intended (up to 25% more!). This results in a dry, stiff dough that’s hard to work with and produces tough cookies. Always spoon flour into your measuring cup and level it off.
- Over-baking: Whipped shortbread should remain pale with only slightly golden edges. If they turn dark brown, they’re likely overbaked and will be dry and hard. They continue to cook slightly from residual heat on the baking sheet after removal from the oven.
Storage Tips
Proper storage is key to maintaining the exquisite texture and flavor of your Classic Whipped Shortbread Cookies.
- At Room Temperature: Once completely cooled, store the cookies in an airtight container at room temperature for up to 1 week. A metal cookie tin is ideal, as it helps maintain their crispness and prevents them from absorbing moisture from the air. Avoid storing them next to strong-smelling foods, as butter-rich cookies can easily pick up other aromas.
- Freezing Baked Cookies: For longer storage, cooled baked cookies can be frozen for up to 3 months. Arrange them in a single layer on a baking sheet to freeze solid, then transfer them to a freezer-safe bag or container, separating layers with parchment paper. Thaw at room temperature before serving.
- Freezing Dough: You can also prepare the dough in advance. Roll it into logs, wrap tightly in plastic wrap, and freeze for up to 3 months. When ready to bake, thaw the log slightly in the refrigerator until it’s firm enough to slice, then bake as directed (you might need an extra minute or two of baking time). Alternatively, pipe the shapes and freeze them on a baking sheet; once solid, transfer to a freezer bag and bake from frozen, adding an extra few minutes to the baking time.
Conclusion
Mastering the Classic Whipped Shortbread Cookies Recipe isn’t just about following instructions; it’s about embracing a few key techniques that elevate a simple cookie to a truly sublime experience. From the careful creaming of butter and sugar to the critical chilling of the dough, each step plays a vital role in achieving that sought-after melt-in-your-mouth tenderness and rich, buttery flavor. Remember, the true magic lies in patience and precision. We hope this comprehensive guide empowers you to bake the most exquisite shortbread you’ve ever tasted. Don’t be shy – bake a batch this week, savor the golden indulgence, and let us know your favorite serving suggestion in the comments below! If you’re passionate about creating delightful drinks that combine fresh fruit and creamy textures, you might enjoy exploring a recipe for a tropical aesthetic smoothie.
FAQ
Q1: Why are my shortbread cookies tough instead of tender?
A1: Tough cookies are almost always a result of overmixing the flour. When flour is mixed too much, the gluten develops, leading to a chewy, bread-like texture. Mix only until the flour streaks disappear.
Q2: My whipped shortbread cookies spread too much. What went wrong?
A2: Excessive spreading is typically due to one of two reasons: either your butter was too warm (too soft or even melted) or you skipped the crucial chilling step. Chilling the dough solidifies the butter, which helps the cookies hold their shape during baking.
Q3: Can I make these Classic Whipped Shortbread Cookies gluten-free?
A3: Yes, you can! Substitute the all-purpose flour with a 1:1 gluten-free baking flour blend that contains xanthan gum. The texture might be slightly different, but it will still be delicious.
Q4: How can I prevent my piped shortbread shapes from losing their definition?
A4: Again, chilling is your best friend here! Ensure your piped cookies are thoroughly chilled for at least 30-60 minutes before baking. Also, make sure your butter isn’t too warm when you start, as a very soft dough will be harder to pipe precisely and more prone to losing shape.
Q5: Can I substitute granulated sugar for powdered sugar?
A5: While you technically can, it’s not recommended for whipped shortbread. Powdered sugar dissolves better, contributing to a smoother dough and a finer crumb. Granulated sugar can make the cookies grittier and tougher.
Q6: What’s the best way to get a consistent shape when piping?
A6: Practice definitely helps! For consistency, ensure your dough is at an even temperature. Apply steady pressure to the pastry bag and try to pipe at a consistent speed. If your hands get warm, the dough in the bag might soften; take a short break or refrigerate the bag for a few minutes.
Q7: How can I tell if my shortbread is fully baked?
A7: Classic Whipped Shortbread is done when the edges are just barely golden, and the centers still look pale. They shouldn’t be dark brown. They will continue to set and firm up as they cool on the baking sheet.
Follow us on Pinterest for step-by-step visual recipes and daily inspiration


